Workflow 2 – Generating reports#
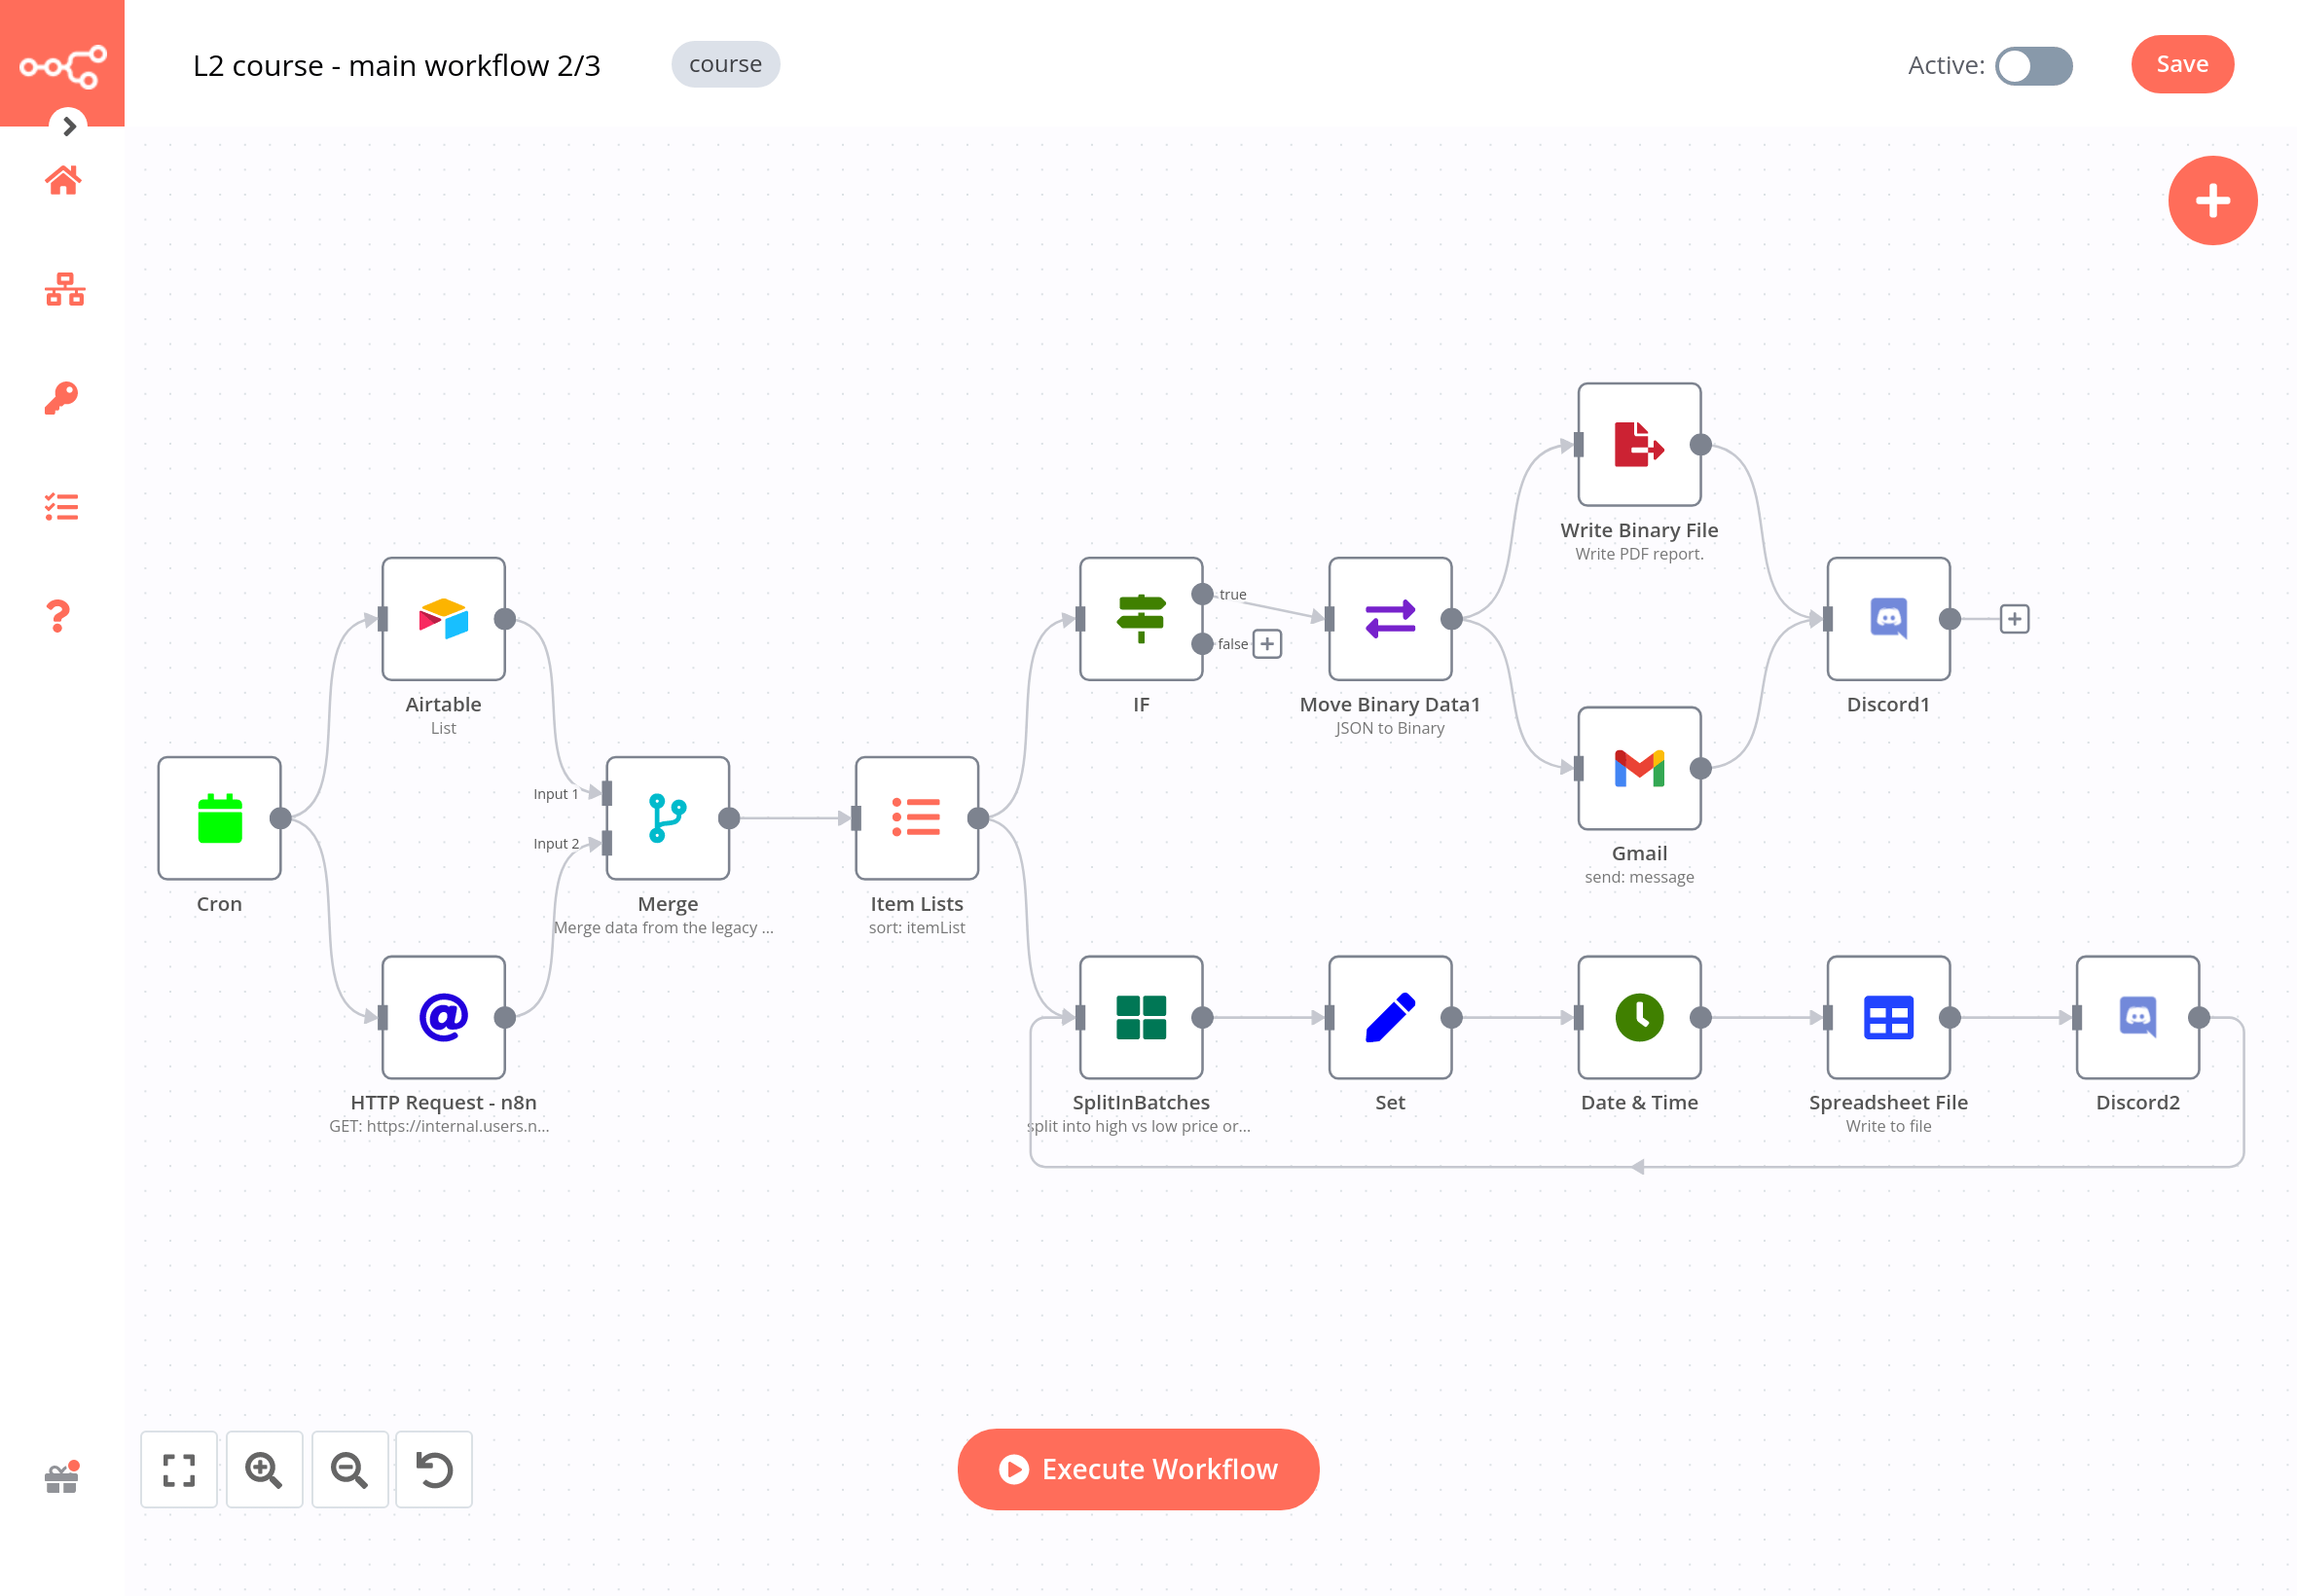
In this workflow, you will merge data from different sources, transform binary data, generate files, and send notifications about them. The final workflow should look like this:

To make things easier, let's split the workflow into three parts.
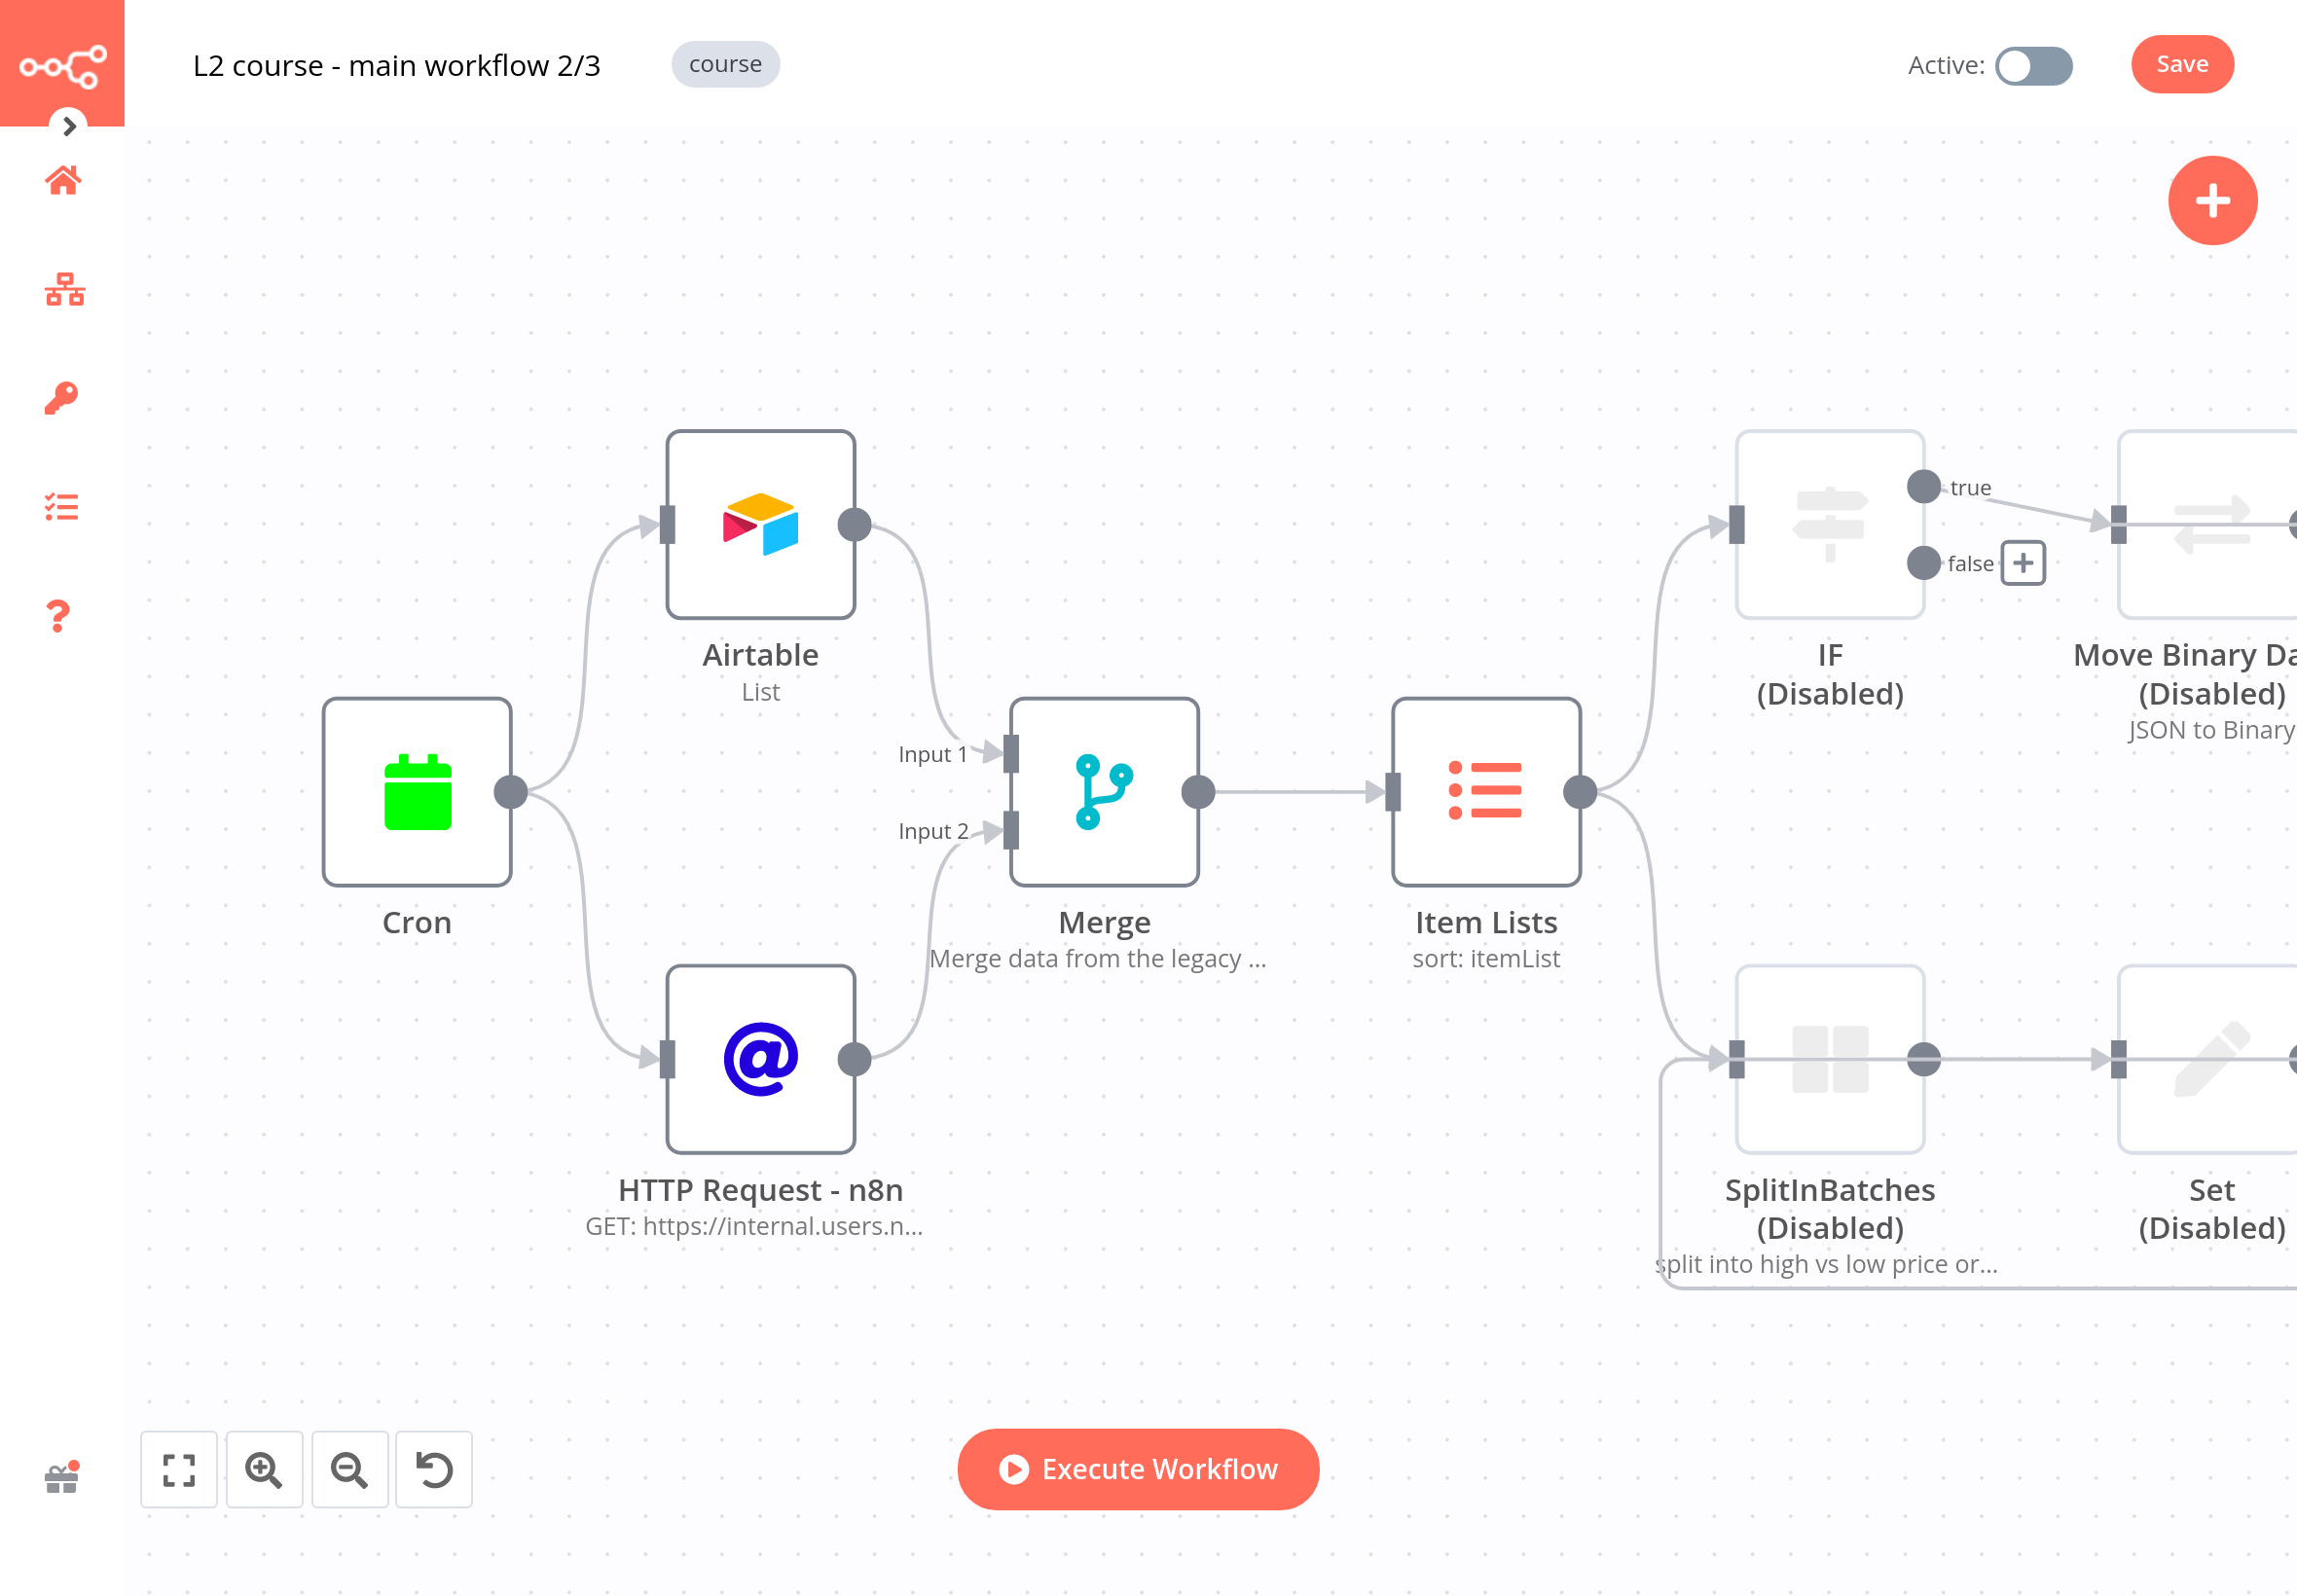
Part 1 – Getting data from different sources#
The first part of the workflow consists of five nodes:

-
Use the HTTP Request node to get data from the API endpoint that stores company data. Configure the following node parameters:
- Authentication: Header Auth
- Credentials for Header Auth: The Header Auth name and Header Auth value you received in the email when you signed up for this course.
- URL: The Dataset URL you received in the email when you signed up for this course.
- Options > Add Option > Split Into Items: toggle to true.
- Headers > Add Header:
- Name: unique_id
- Value: The unique ID you received in the email when you signed up for this course.
-
Use the Airtable node to list data from the
customerstable (where you updated the fieldsregionandsubregion). - Use the Merge node to merge data from the Airtable and HTTP Request node, based on the common key
customer ID. - Use the Item Lists node to sort data by orderPrice in descending order.
Quiz questions
- What is the name of the employee assigned to customer 1?
- What is the order status of customer 6?
- What is the highest order price?
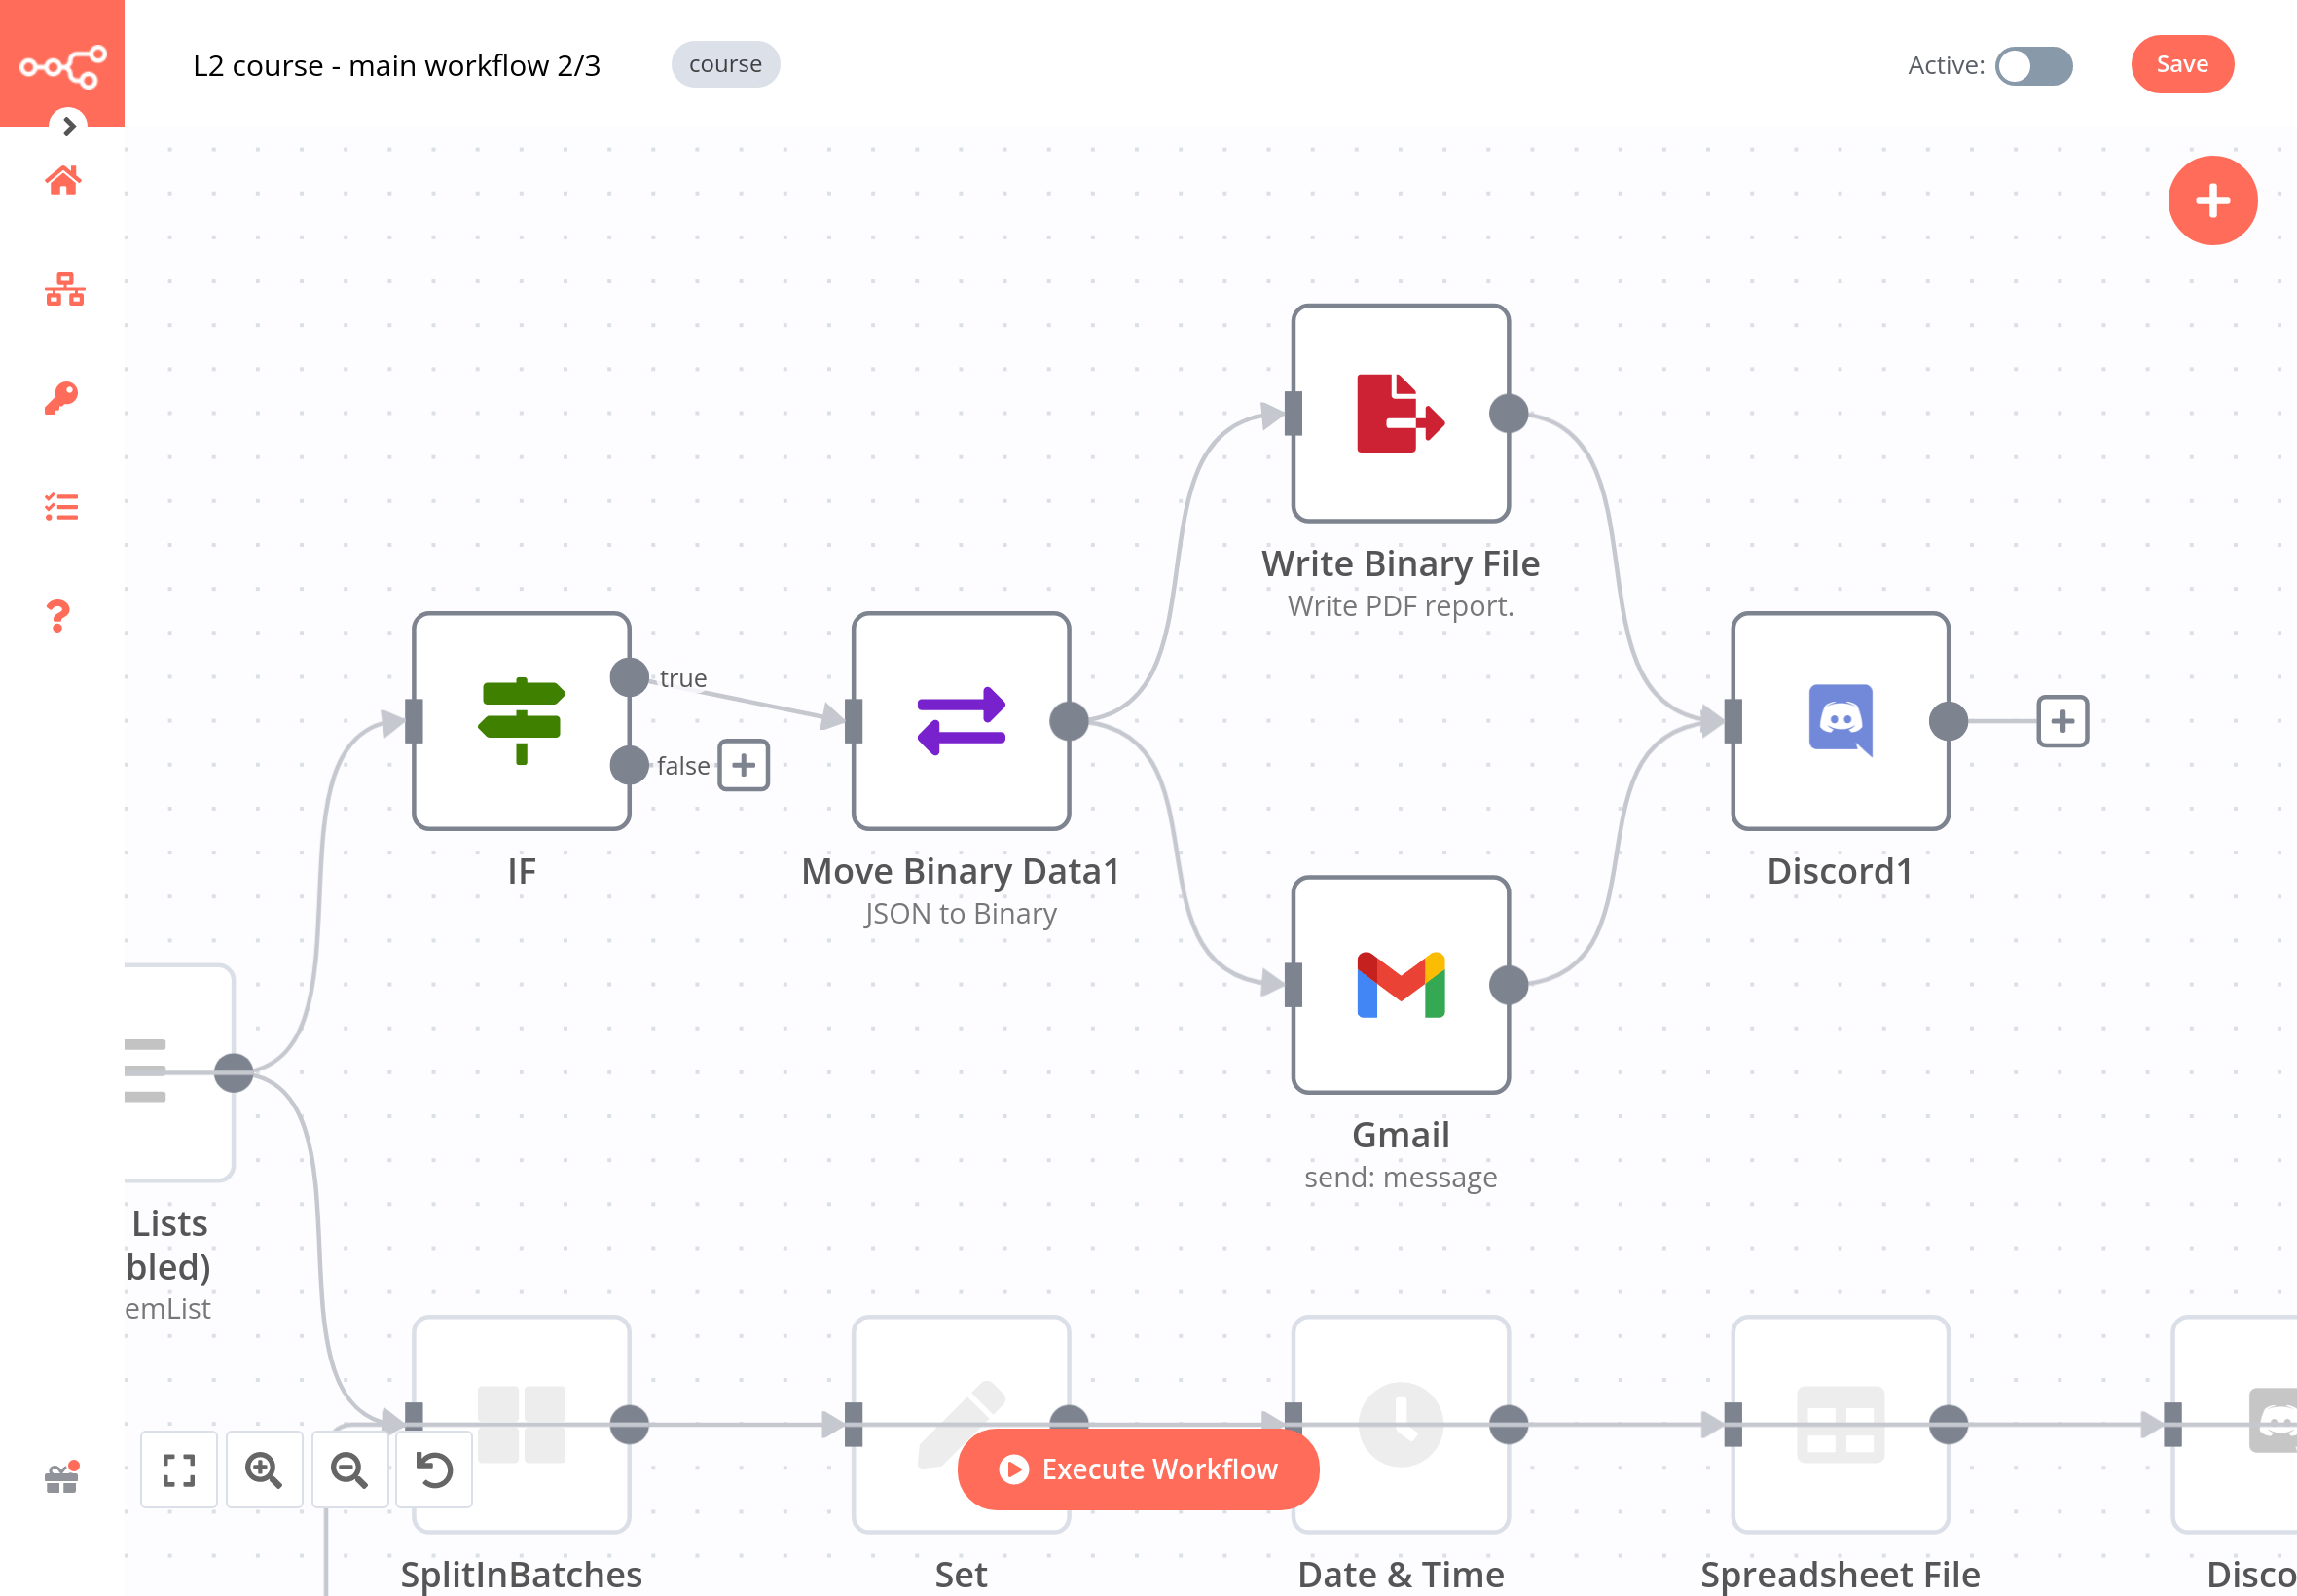
Part 2 – Generating file for regional sales#
The second part of the workflow consists of five nodes:

- Use the IF node to filter order from the region Americas.
- Use the Move Binary Data node to transform the incoming data from JSON to binary format. Note that you need to convert all data.
- Use the Write Binary File node to create and store files with the orders information. In the File Name field, use an expression to include the oder id in the file name, like this:
report_orderID{oder_id}.json(you need to replace the{order id}with the reference the Move Binary Data node). - Use the Gmail node (or another email node) to send the files via email to an address you have access to. Note that you need to add an attachment with the data property.
- Use the Discord node to send a message in the n8n Discord channel
#course-level-two. In the node, configure the following parameters:- Webhook URL: The webhook URL you received in the email when you signed up for this course.
- Text: "I sent the file via email with the label ID
{label ID}and wrote the binary file{file name}. My ID: " followed by your ID.
Note that you need to replace the text in curly braces{}with expressions that reference the data from the nodes.
Quiz questions
- How many orders are assigned to the region Americas?
- What is the total price of the orders in the region Americas?
- How many items are returned by the Write Binary File node?
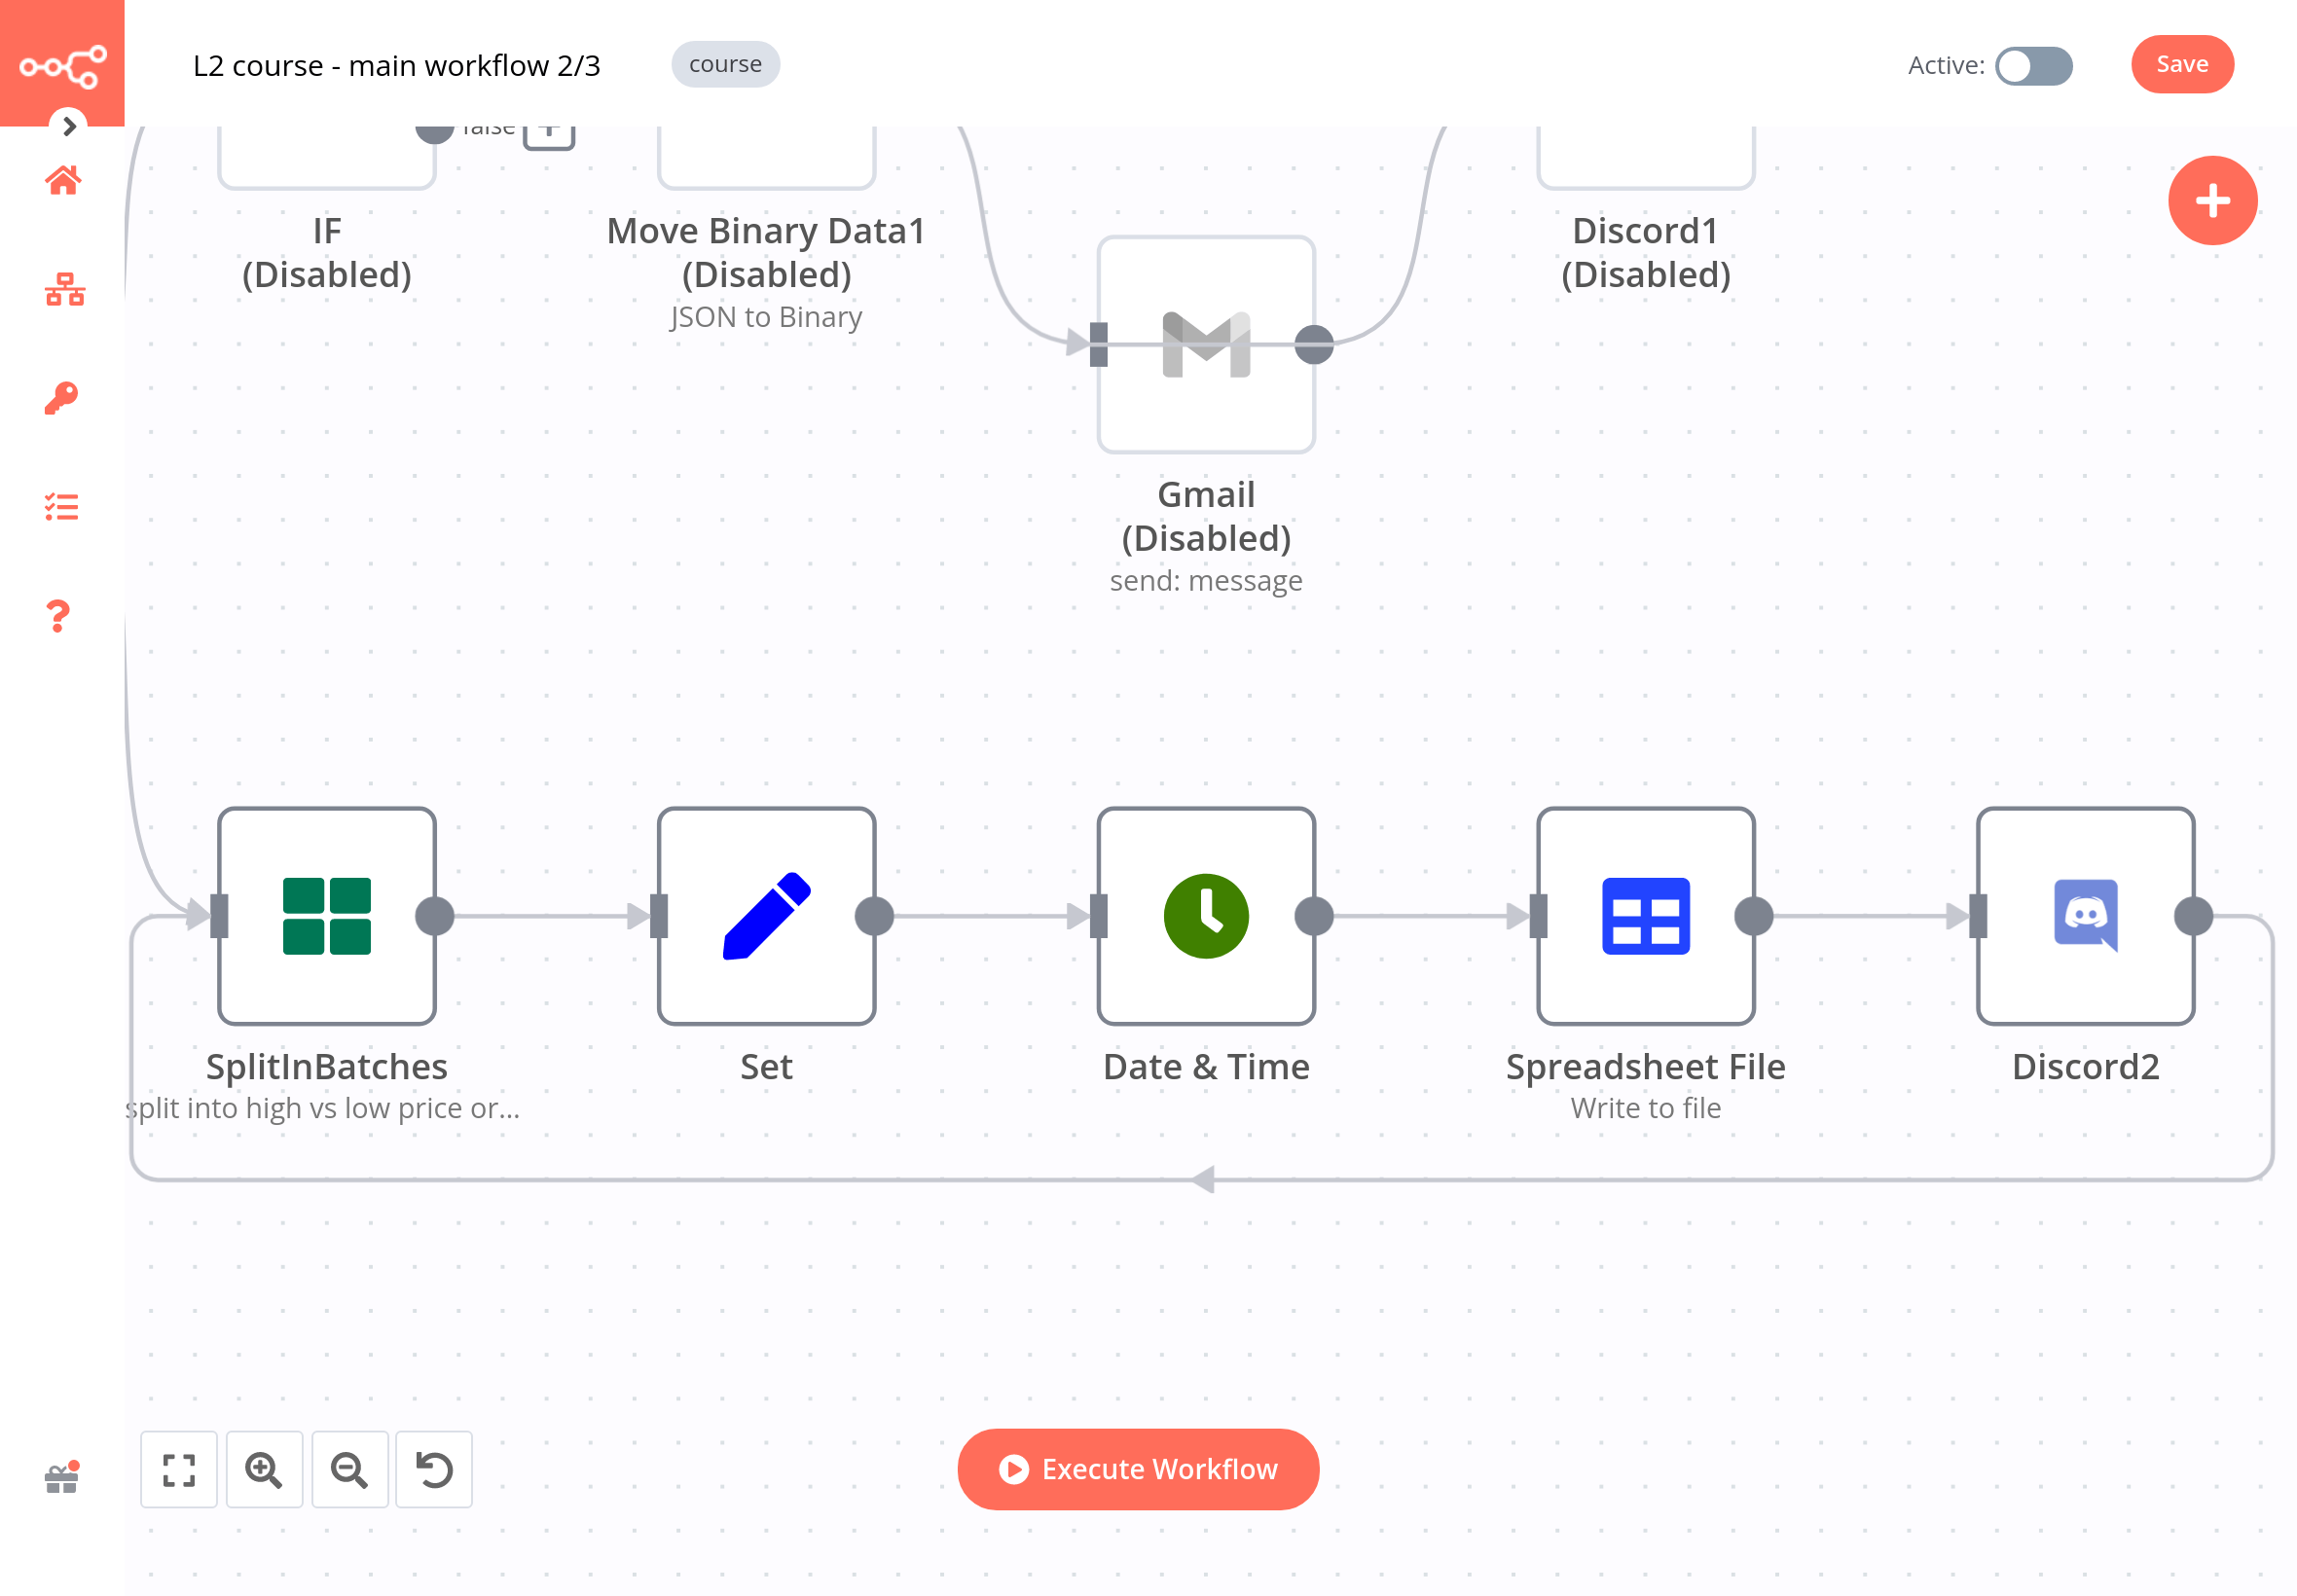
Part 3 – Generating files for total sales#
The third part of the workflow consists of seven nodes:

- Use the Split In Batches node to split data from the Item Lists node into batches of 5.
- Use the Set node to set four values, referenced with expressions from the previous node:
customerEmail,customerRegion,customerSince, andorderPrice. - Use the Date & Time node to change the date format of the field
customerSinceto the format MM/DD/YYYY. - Use the Spreadsheet File node to create a CSV spreadsheet with the file name set as the expression:
{{$runIndex > 0 ? 'file_low_orders':'file_high_orders'}}. - Use the Discord node to send a message in the n8n Discord channel
#course-level-two. In the node, configure the following parameters:- Webhook URL: The webhook URL you received in the email when you signed up for this course.
- Text: "I created the spreadsheet
{file name}. My ID:" followed by your ID.
The{file name}should be an expression that references data from the Spreadsheet File node.
Quiz questions
- What is the lowest order price in the first batch of items?
- What is the formatted date of customer 7?
- How many items are returned by the Spreadsheet File node?