Edit Image#
The Edit Image node is used to manipulate and edit images.
Keep in mind
- If you are not running n8n on Docker, you'll need to install GraphicsMagick.
- You will need to use an additional node such as the Read Binary File node or the HTTP Request node to pass the image file as a data property to the Edit Image node.
Node Reference#
- Operations
- Add a blur to the image to reduce sharpness
- Add a border to the image
- Create a new image
- Crop the image
- Composite an image on top of another image
- Draw on an image
- Get information about the image
- Rotate the image
- Change the size of the image
- Shear image along the X or Y axis
- Add text to the image
You can also specify a file format using the Format field in the Add Option dropdown list.
- Options
- File Name field: Allows you to specify the filename of the output file.
- Format field: Allows you to specify the image format of the output file:
- BMP
- GIF
- JPEG
- PNG
- TIFF
Example Usage#
This workflow allows you to add text to an image downloaded from the internet using the Edit Image node. You can also find the workflow on n8n.io. This example usage workflow would use the following nodes. - Start - HTTP Request - Edit Image
The final workflow should look like the following image.

1. Start node#
The start node exists by default when you create a new workflow.
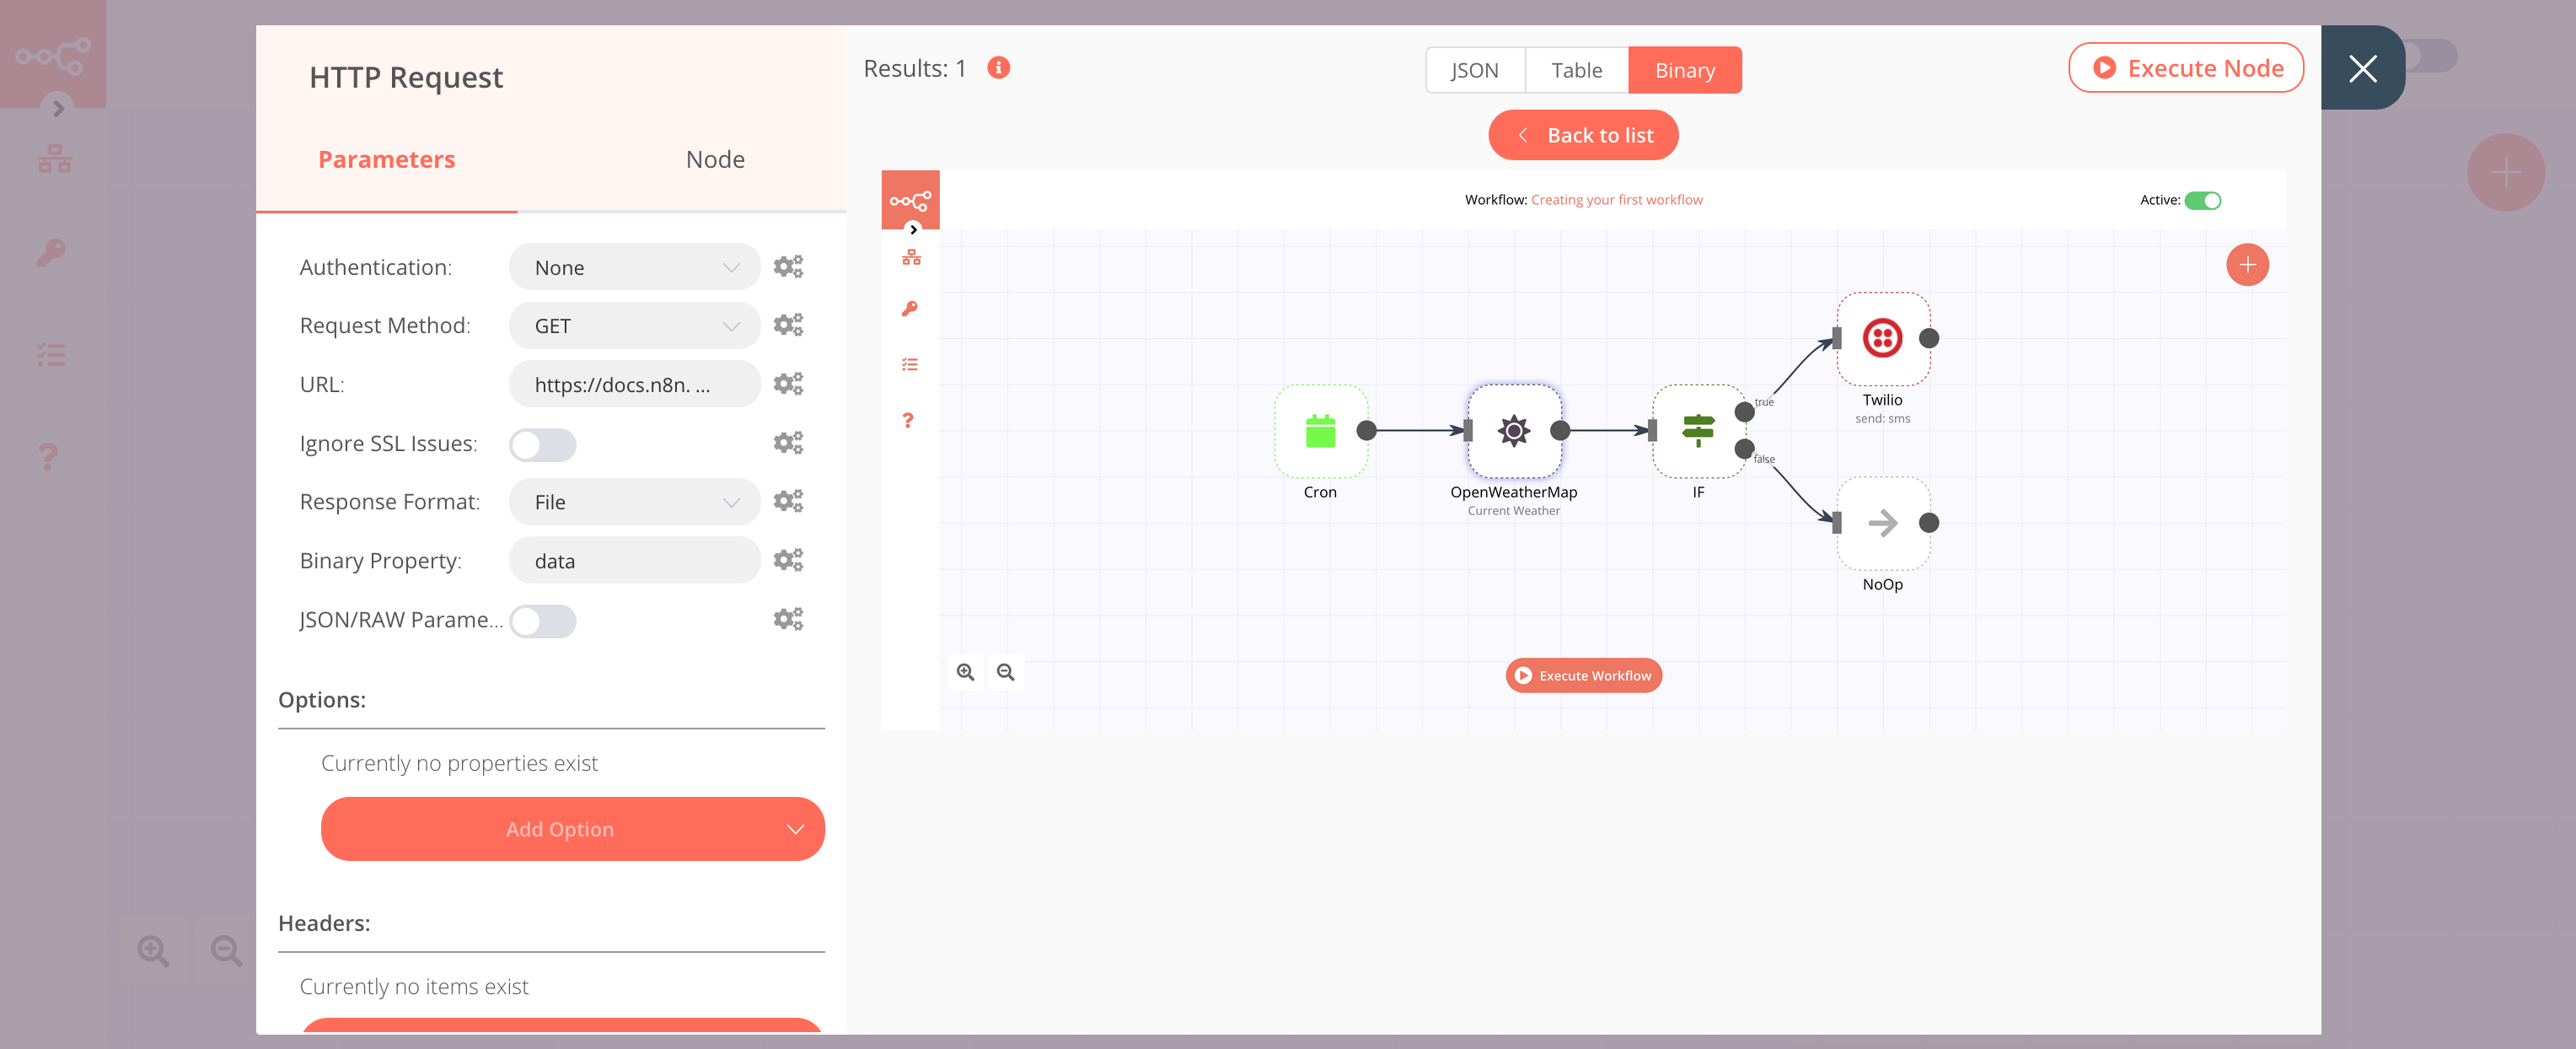
2. HTTP Request node#
- Enter
https://docs.n8n.io/assets/img/final-workflow.f380b957.pngin the URL field. - Select 'File' from the Response Format dropdown list.
- Click on Execute Node to run the node.

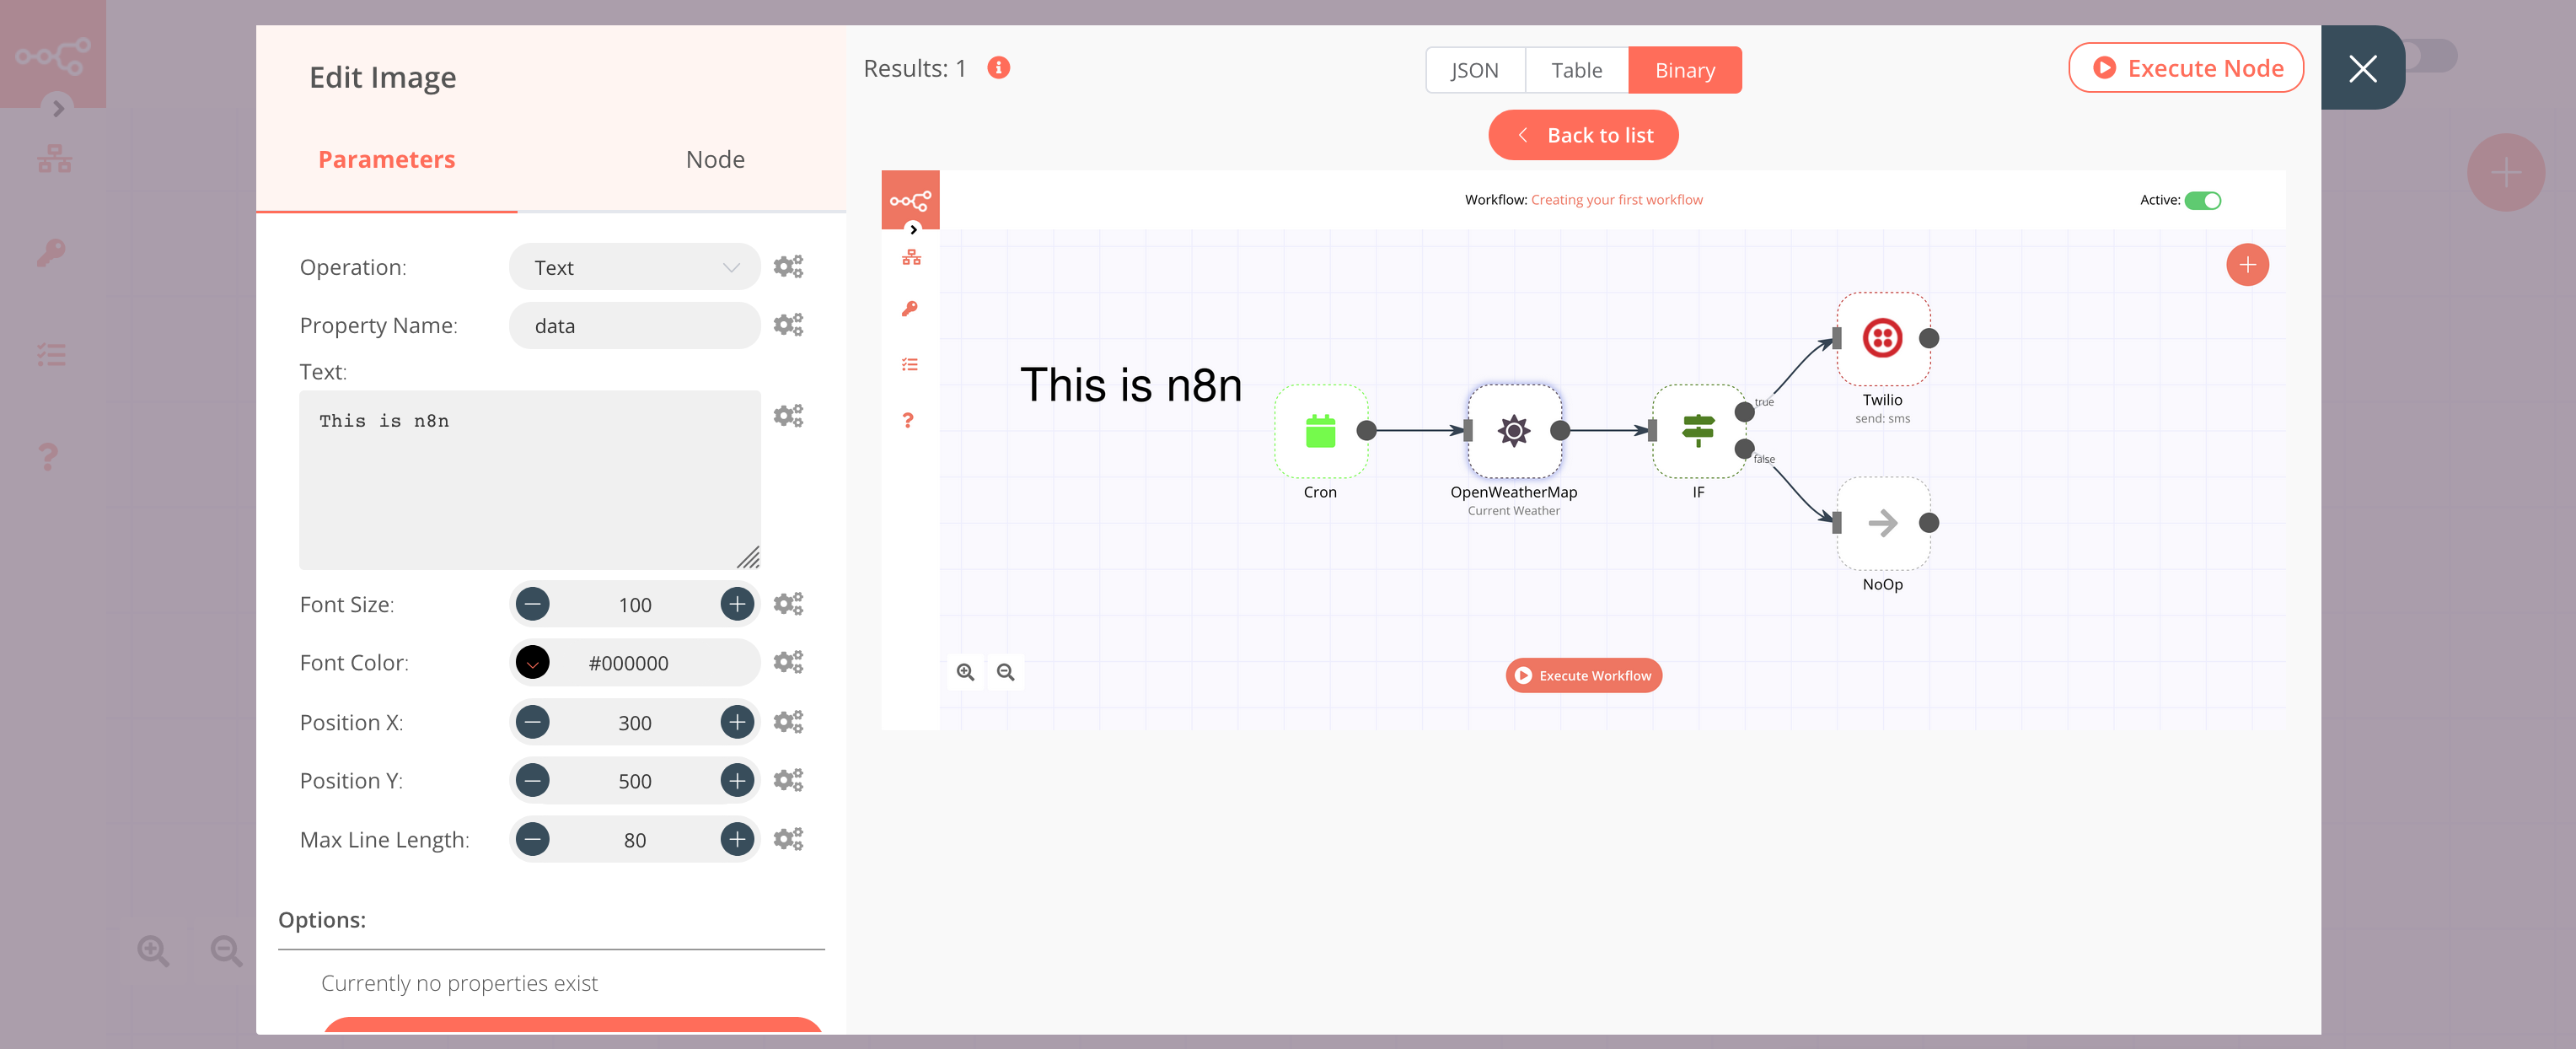
3. Edit Image node#
- Select 'Text' from the Operation dropdown list.
- Enter
This is n8nin the Text field. - Enter 100 in the Font Size field.
- Enter 300 in the Position X field.
- Enter 500 in the Position Y field.
- Click on Execute Node to run the node.
